Procedure

  • Subscribe to our RSS feed.
  • Twitter
  • StumbleUpon
  • Reddit
  • Facebook
  • Digg

Monday, February 25, 2013

PlayStation 4 vs. PC graphics: Can Sony even compete?

Posted on 3:52 PM by Unknown

Sony's PlayStation 4 launch last Wednesday was monumental, and not just because it may very well be the first console announcement in history where the company failed to actually show the console itself.
While the rest of the world was bemoaning the mythical, missing hardware, Sony also announced some basic high-level hardware specifications for the impending machine. Hidden within the technical jargon was a secret: This so-called console is in fact a full-blown x86 PC at its multicored core. More interestingly, the specs indicate that unlike its predecessor—which was an absolute beast when it launched seven years back—the PlayStation 4 will likely lag behind cutting-edge gaming PCs from the very first day it hits the streets.
That's not exactly a surprise. "If you predict how hardware evolves at the current speed of evolution, and then take consumer pricing evolution, already two years ago you could see [that] whatever [console] launches in 2013 or 2014 or 2015 will never beat a PC again," Crytek head Cevat Yerli recently told Eurogamer.
Sony just proved Yerli correct. Should gamers on either side of the console/PC divide be worried?

The PlayStation 4 by the numbers

PS4 controller
Sony's PlayStation 4 controller was a big focus at the console's announcement event.
Before we dive into portents, let's talk about the PlayStation 4's core technical specifications and how they stack up against desktop gaming rigs. (Fear not—I'll try to keep the jargon to a minimum.)
A "semi-custom" AMD accelerated processing unit (APU) lies at the heart of the PlayStation 4. It's made up of eight CPU cores based on the company's upcoming "Jaguar" architecture. Those Jaguar cores are joined by a next-generation Radeon GPU featuring 18 compute units capable of pumping out 1.84 teraflops of performance power.
As with every other AMD APU, both the CPU cores and the GPU are situated on the same physical die, and the two will have a whopping 8GB of blazing-fast GDDR5 memory to share between them. (Cue Keanu Reeves: Whoa.) Some other specs were announced, but the central APU is really the focus here.
Most of the intricate details about the PlayStation 4's custom-designed hardware are still shrouded in secrecy. But by leveraging what we already know about AMD's technology, we can make a reasonable guesstimate about the console's performance compared to modern-day gaming PCs—and it ain't exactly awe-inspiring.

Comparing apples to apples

First, there's the matter of the CPU cores. Without getting into technicalities, AMD's Jaguar architecture is the impending successor to the "Bobcat" architecture found in the company's current low-power APUs, and it is not especially beefy. While the idea of an octa-core console sounds dreamy on the surface, the illusion is shattered when you realize that on the PC side of things, Jaguar APUs will be modest processors targeted at tablets, high-end netbooks (ha!), and entry-level laptops.
AMD
In other words, the PlayStation 4's CPU performance isn't likely to rock your socks compared to a PC sporting an AMD Piledriver- or Bulldozer-based processor. It might not even trump a lowly Intel Core i3 processor, especially if Eurogamer's early PlayStation 4 leaks continue to prove accurate and those eight cores are clocked at 1.6GHz.
Then there's the GPU. The specs don't line up with any of AMD's Radeon HD 7000-series graphics cards, and we can't be sure just how custom the semi-custom GPU actually is. Nonetheless, 1.84 teraflops of performance puts the GPU just ahead of the Radeon HD 7850 and well under the Radeon 7870. That also holds true if you assume the PlayStation 4 GPU's 18 compute units sport a build similar to the GCN architecture used to build AMD's Radeon HD 7000-series graphics cards.
The Radeon HD 7850 is nothing to sneeze at. Indeed, if you're looking for a midrange video card, it's a stellar option. But it's still just a midrange card, not a graphical trail blazer—and yet it will form the backbone of the PlayStation 4's gaming chops for years to come.
Overall, if you compare its hardware to what's available in today's PC landscape, the PlayStation 4 is basically powered by a low-end CPU and a midrange GPU. It even packs a mechanical hard drive in an age when many PC gamers have moved on to lightning-quick solid-state drives.

Comparing apples to hula hoops

But wait! I'm not slamming the PlayStation 4. A gaming PC is not a gaming console. Unlike gaming PCs, which can be overclocked and water cooled and often cost north of $1000, consoles need to balance performance, cost, and thermals in order to appeal to the mainstream masses while simultaneously staying small and quiet enough for living room use. These constraints place inherent limits on what these next-gen consoles can accomplish.
"Given consumer pricing, and given the cost of production of a gamer PC and the amount of watts of power it needs—which is like a fridge—it's impossible [for next-gen consoles to match the power of gaming PCs]," Crytek's Yerli explained in his Eurogamer interview.
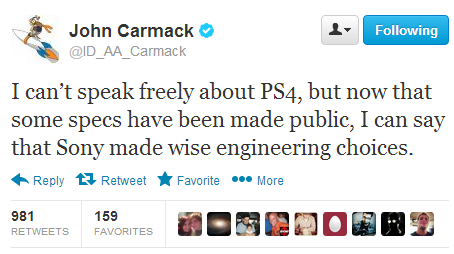
All that said, Sony's design decisions make a lot of sense. (Just ask Doom creator and programming prodigy John Carmack.) Assuming AMD's Jaguar cores follow the lead of their Bobcat predecessors, they'll sip power and run cool and quiet.
Sure, an entry-level mobile CPU may not match the raw power of a decent desktop processor, but the PlayStation 4's power will still blow the pants off the PlayStation 3 and Xbox 360 in terms of sheer computing chops—and the GPU has always been the more important component for consoles in any case.
Simply focusing on nuts and bolts, however, ignores the biggest trick the PlayStation 4 has up its sleeve.
"Hardware-only, the PS4’s 2TFLOP capabilities put them on the same bar as AMD’s 7870 when you factor in GPU and CPU," Patrick Moorhead, principal analyst at Moor Insights and Strategy, told us via email. Important note: Moorhead was a longtime VP of Strategy at AMD prior to founding his firm.
"This is only one view, though—the other being software," Moorhead says. "Sony’s development kit and games operate closer to the actual metal of the hardware, meaning they can get it to do more for games than a traditional PC. The PS3 has seven-year-old graphics technology in it, yet it can deliver some very good graphical experiences. Imagine what the PS4 will be able to do with current high-end technology."
Better yet, don't imagine. The video below shows a live demo of the PlayStation 4 titleKillzone: Shadow Fall being played on "Late Night with Jimmy Fallon." (Jump ahead two minutes to cut straight to the gaming action.) Uncanny valley, here we come!

What does it all mean?

So what do the PlayStation 4's computer-esque specs portend for the games industry? By adopting the oh-so-familiar x86 CPU architecture used in PCs, Sony made it a lot easier for developers to build games that work on both computers and consoles with minimal fuss—especially if the Xbox 720 also utilizes a similar AMD APU with 8 Jaguar cores, as has been uttered in fairly credible rumors.
Even better, PC gamers should hopefully see the number of shoddy console ports drop precipitously once the next-gen consoles are here, because console developers will already pretty much be writing their games for PC hardware. The transition may also pay dividends for console gamers, since tapping into the familiar x86 architecture could mean console developers will be able to put the pedal to Moorhead's proverbial metal early in the PlayStation 4's lifecycle.
The PlayStation 4 is also a major win for AMD, and one that will be amplified if the next-gen Xbox indeed uses an AMD APU of its own. Not only does the PlayStation 4 ensure a steady revenue stream for years to come, but it also ensures that all games developed with an eye toward console conversion will be optimized to work on AMD's GPUs—a huge advantage for the (somewhat struggling) hardware giant. The appearance of APUs in mainstream consoles also advances AMD's "heterogeneous system architecture" initiative.
Finally, the PlayStation 4's APU-powered core only cements the fact that gaming is undergoing a convergence. Sorry, pitchfork-wielding fanboys, but the walls you've so vociferously defended on either side of the PC-versus-console debate are being torn down.
CRYTEK
Consoles, computers—they all play Crysis these days. But PCs do it better.
PC gaming is breaking away from the desktop, consoles are streaming games to smartphones and being controlled by Windows apps, the PlayStation 4 is nothing more than a computer in a console's clothing, and you can tweet from absolutely any gaming device you can get your grubby hands on. (If the ability to send 140-character messages from everywhere isn't the true meaning of convergence, I don't know what is.)
Yes, the future of gaming is shaping up to be an amorphous any-screen blob, but within that blob, consoles and PCs will continue to remain the commanders of their respective niches. The next generation of consoles will provide an easy-peasy plug-and-play gaming experience, complete with killer extra features and performance that far exceeds what's possible with the current console generation's hardware.
But if you're the type of gamer who lives and breathes on the bleeding edge of polygon-pumping power—one who will accept no less than the highest of details settings and the smoothest of frame rates—it appears as though PC gaming will remain the undisputed heavyweight champion for the foreseeable future. Just remember that great performance comes with a hefty price.
Source
Read More
Posted in play station 4, sony | No comments

Saturday, February 23, 2013

How to make Ubuntu Linux look like Windows 7

Posted on 6:45 PM by Unknown

Windows 8's tile-based interface puts a bold new spin on the familiar Windows interface—so bold that many long-time Windows users are threatening to jump ship to another operating system rather than learn Microsoft's "modern" UI. Of course, you'll still find yourself in foreign territory even if you actually follow through and make the jump. Installing a new operating system is easy, but wrapping your head around an alien environment can be more difficult, even if you're using a comparatively user-friendly OS like Ubuntu Linux.
Luckily, Linux is customizable—much, much more than Windows. In fact, if you're having trouble with the transition (or plopping Ubuntu on a parent's PC), you can tweak and tune the OS to feel pretty darned close to the Windows environment you've forsaken.
I’ll go through two methods here. One adapts Ubuntu’s default Unity desktop to make it feel slightly more like Windows, while the other entails a bit more work and a different desktop interface entirely to create a truly Microsoft-like experience.

Creating a Windows 7-style Ubuntu

Ubuntu's default desktop is clean, but not very Windows-like.
To be completely honest, Ubuntu's default Unity desktop may be slick and pretty, but it isn’t the most configurable Linux environment around. The taskbars running the top and left sides of its screen are locked in place and can’t be moved whatsoever. Unity is still fairly flexible, however, and some basic—for Linux—tweaks can give it some of that old Windows 7 charm.
A quick note: These tips were tested on Ubuntu 12.10, the most current version of the operating system at the time of publication.
We’re going to use some terminal commands throughout the course of this article. If you’re a new Linux user, don’t be scared—Linux’s powerful command line makes it easy to follow instructions you’ll find in articles like this one. Instead of following a list of long steps telling you to click here and click there, you can just copy and paste these commands into a terminal window and hit Enter.
To open a terminal, press the Windows key (known as the Super key in Linux), typeTerminal, and press Enter. You can also click the Ubuntu logo at the top-left corner of your screen instead of pressing the Windows key.
We're getting there...
First, we’re going to install a Windows 7 theme pack. Copy and paste the following commands into the terminal window in order, pressing Enter after each command to run it. The first command adds a personal package archive (PPA) to your system that Ubuntu can install packages from. The second command downloads information about the newly available packages, and the third command installs the Windows 7 theme—no installation wizard required. Typing sudo before each command allows it to run with root permissions, similar to running a program as administrator in Windows.
sudo add-apt-repository ppa:upubuntu-com/gtk3
sudo apt-get update
sudo apt-get install win2-7
The Win2-7 theme is now installed. To enable the icon, window border, and widget theme, copy and paste the following commands into the terminal. As you run each command, you’ll see your desktop gradually transform and become more Windows-like.
gsettings set org.gnome.desktop.interface gtk-theme 'Win2-7-theme'
gsettings set org.gnome.desktop.wm.preferences theme 'Win2-7-theme'
gsettings set org.gnome.desktop.interface icon-theme 'Win2-7-icons'
The taskbar-like launcher at the left side of your screen will still be a different color. Never fear—like Windows 7’s taskbar, the launcher derives its colors from your desktop wallpaper. For this article, we’ll use Windows 7’s default wallpaper, which you can find all over the Internet. (I snagged my copy from an old ZDNet post.) If you’re using Firefox on Ubuntu, right-click the full-size wallpaper image in your browser and select Set as Desktop Background.
You’ll also want to move the window management buttons—close, minimize, and maximize— located at the top-left corner of each window by default. Use this command to put them in a Windows-style order:
gsettings set org.gnome.desktop.wm.preferences button-layout 'menu:minimize,maximize,close'
To remove the Mac-style global menu bar and put the menu bar (containing File/Edit/View) back into each individual application window, run this command:
sudo apt-get autoremove appmenu-gtk appmenu-gtk3 appmenu-qt indicator-appmenu
You’ll have to log out and log back in for this change to take effect. Use the button at the top-right corner of your screen to log out.
Behold Windows and Ubuntu's love child!
Do you like what you see? This is as close to Windows 7 as we’re going to get with Ubuntu’s default Unity desktop environment. If it doesn't quite scratch your itch, keep reading to learn how to create a more traditional Windows 7-style look using the Xfce desktop environment.

Installing and customizing Xfce

For this method, we’ll be throwing Ubuntu’s default Unity desktop out and going our own way. (Okay, we’re not actually throwing it out, just selecting a different environment on the login screen). Xfce is one of the most popular desktops that still offers a lot of configurability. Install it with this command:
sudo apt-get install xubuntu-desktop
Log out of Ubuntu using the menu at the top-right corner of the screen and click the icon next to your name on the login screen. Select Xubuntu session and log in normally. (You can install multiple desktop environments and toggle between them on the login screen like this.)
Xfce also uses a two-panel layout by default. We’ll have to do some heavy customization to get it looking more like Windows 7, but it’s all graphical—if you’re a Windows power user, you’ve done this kind of tweaking many times before.
First, get rid of the top panel. Right-click it, point to Panel, select Panel Preferences, and click the red Remove button. Use the drop-down box in the panel configuration window to select the other panel. Uncheck the 'Automatically show and hide the panel' option and check the 'Automatically increase the length' option. Now we’re getting somewhere! At this point, you should have a single taskbar-like panel across that bottom of your screen.
Use the buttons on the Items panel to remove the items you don’t want, add the items you do want, and reorder them as you see fit. For a Windows 7-style taskbar, try using these items in the following order:
Applications Menu, Separator, Launcher, Window Buttons, Separator, Notification Area, Indicator Plugin, Show Desktop.
The item options for Xfce's panel are nice and simple.
Add as many launchers (read: shortcuts) as you like to the launcher section and think of them as your new quick launch bar. Unfortunately, Xfce can’t group applications and open windows the same way Windows 7’s taskbar can, so it’s a bit more old school.
To configure an item, select it in the list and click the Gear button. You’ll also want to disable the 'Show button title' option in the Applications Menu item’s settings.

Theming Xfce to look like Windows

Now we just have to make Xfce look more like Windows 7. If you didn’t run any of the commands in the Unity section above, run the commands below in a terminal. (Right-click the desktop and select 'Open terminal here' to open a terminal in Xfce.)
sudo add-apt-repository ppa:upubuntu-com/gtk3
sudo apt-get update
sudo apt-get install win2-7
gsettings set org.gnome.desktop.wm.preferences theme 'Win2-7-theme'
gsettings set org.gnome.desktop.wm.preferences button-layout 'menu:minimize,maximize,close'
Open the Settings Manager from the applications menu and click the Appearance icon. Select Win2-7-theme in the Style list and select Win2-7 in the Icons list.
Press Alt+F2 and run the following command to get Windows 7-style window borders. If you're typing this out rather than copying and pasting, note that the command includes a double-dash, not a long em dash.
metacity --replace
Go into the Session and Startup panel in the Settings Manager, select the Application Autostarttab, and click the Add button. Enter Metacity as the application’s name andmetacity --replace as its command. Now Windows 7-style window borders will automatically start with your desktop.
To make your panel look more like Windows 7’s panel, right-click it, point to Panel, and select Panel Preferences. On the Appearance tab, select Background image and browse to the \usr\share\themes\Win2-7-theme\gtk-2.0\Panel\ directory on your computer. Select a background image like Panel_Win2-7Basic800.png. The theme pack we installed includes a variety of panel backgrounds, so feel free to experiment.
You can also change the applications menu’s graphic and make it use a Windows 7-style start orb. First, find a Windows 7 start orb image—you can find several on Google Images, but make sure you get a transparent PNG image. Once you’ve found a good image, right-click the Applications menu button, select Properties, and use the Icon button to select your start orb.
Here it is: A Linux OS in Windows clothing, perfect for those afraid of change.
Phew, that took a lot of tweaking (and a lot of text)—but we now have a Windows 7-style desktop on Ubuntu. It lacks a Windows 7-style Start menu and taskbar, but Windows users that prefer the classic Start menu and taskbar behavior will find it immediately familiar.

Undoing your changes

Want to undo your changes? If you followed the first method, just run these commands. Remember to log out and log back in after running the commands to restore the global menu bar.
gsettings reset org.gnome.desktop.interface gtk-theme
gsettings reset org.gnome.desktop.wm.preferences theme
gsettings reset org.gnome.desktop.interface icon-theme
gsettings reset org.gnome.desktop.wm.preferences button-layout
gsettings reset org.gnome.desktop.background picture-uri
sudo apt-get install appmenu-gtk appmenu-gtk3 appmenu-qt indicator-appmenu
If you followed the second method, log out and select Ubuntu’s default desktop environment from the login screen. You can toggle between the two whenever you like. If you’d like to uninstall Xfce, use this command:
sudo apt-get autoremove xubuntu-desktop
These processes are a good demonstration of just how configurable Linux is. You can rip out software from the default desktop, use all sorts of themes, install a completely different desktop environment, or even build your own desktop environment by cobbling together pieces from different desktop environments—that’s what we did in the last section.
Source
Read More
Posted in how to, ubuntu, What to do, windows 8, windows7 | No comments

Thursday, February 21, 2013

Power through Gmail with 21 time-saving tricks

Posted on 2:58 AM by Unknown

Gmail is the world's most popular email service, but some of its best features are hiding in plain sight, unknown to most users. Although Gmail provides unsurpassed search capabilities, great spam filtering, and loads of free storage (10GB at latest check), it also offers much more—and there's always room for improvement, too. With a little know-how and some key add-ons, you can make Google's webmail service jump through hoops in ways you never thought possible.
Tired of Gmail's threaded conversation view? Turn it off. Want to learn keyboard shortcuts? A pop-up cheat sheet is built right in. And wouldn’t it be nice if you could save attachments straight to your Dropbox account? Easy enough—with the right tool.
This guide will help Gmail novices and experts alike squeeze more from the service. Most of the tips are based on using Gmail in a Web browser, but be sure to see the "Gmail from the outside in" section to learn how to make the most of Gmail even when you’re not in your browser.

Work smarter, not harder

1. Search for big attachments
We quickly found messages containing the word "power" and 15MB of attachments.
Gmail is known for its robust search capabilities, and now it supports another handy search parameter: message size. So if you want to find, say, all email messages that have attachments larger than 10MB, you’d simply search for size:10m. And you can pair that with the “older_than” modifier for searches like size:10m older_than:6m (to get all email larger than 10MB and older than six months).
2. Work offline
Working on an airplane without Wi-Fi? Live in an area where Internet access is slow or spotty? Either way, install Gmail Offline. With it you can read, respond to, compose, search, and archive messages, all of which will be automatically sent or synced the next time you’re online. Just one catch: It requires Google Chrome. If you use another browser, you’re out of luck.
3. Tame messy replies
The longer an email conversation (or “thread”) gets, the harder it becomes to wade through that messy, cluttered explosion of text. That’s because normally, when you click Reply, Gmail quotes the entire original email and all subsequent replies. Thankfully, you have an easy workaround: In the sender's message, select the exact text you're replying to—the meat of the message, as it were—and then click Reply. Now, when Gmail creates the reply, it will include only the highlighted text. Translation: a lot less mess.
4. Turn off conversation view
If you like a more traditional inbox appearance, turn off conversation view.
Speaking of messy, some people would argue that Gmail’s conversation view (also known as message threading) makes things extremely so, as it groups together messages with the same subject. If you’d rather have your messages spread out, and therefore easier to navigate at a glance, head to Gmail’s Settings (under the General tab) and selectConversation view off.
5. Master keyboard shortcuts
KeyRocket suggests keyboard shortcuts for actions you've recently taken.
Hands off the mouse. You can dramatically accelerate your Gmail operations by learning various keyboard shortcuts: R for reply, Ctrl-K to insert a link, Ctrl-Enter to send, and so on. For a full, pop-up list of available shortcuts, press Shift-? while viewing your Gmail inbox. Google also has a webpage that lists all Gmail shortcuts. And if you’re a Chrome user, you can learn shortcuts much faster by installing the KeyRocket for Gmail add-on, which teaches you while you work.
6. Make important messages bubble to the top
Email from work, friends, relatives—important. Email from stores, Facebook, and people you don’t know—less important. Gmail’s Priority Inbox feature can prioritize your mail so that the important stuff appears at the top, where it’s less likely to get lost in the shuffle. To enable the feature, head to Settings, click the Inbox tab, and choose Priority Inbox from the Inbox Type selector. This feature can be a little tricky to wrap your head around, so read Google’s Priority Inbox overview if you need help.
7. Restore the old-school buttons
Buttons without text labels can be confusing. Fortunately, Gmail lets you restore them.
A while back, Gmail replaced most of its buttons—Archive, Delete, Spam, and so on—with icons that some users find cryptic, or at least harder to recognize at a glance. If you’d rather have buttons with text instead of icons, you can restore them: Just go to Settings > General, scroll down to Button Labels, and change the setting to Text.

Bring on the add-ons

8. Add a snooze button to your inbox
Not ready to reply? Schedule a reminder.
Can’t attend to a particular message just now? Even if you mark it as unread, newer email will eventually push it down and out of sight. What you need is a way to “snooze” that message, to make it return to the top of your inbox at a designated time. Two great options are Boomerang and Snooze Your Email. Both integrate with Gmail, adding buttons that make it simple to set the delay for a specific number of minutes or days. Boomerang works with Chrome and Firefox and costs $5 per month; Snooze Your Email is free, but works only with Chrome.
9. Turn email into to-dos
Gmail has a built-in task list, but it’s a little anemic—especially if you want to access that list elsewhere. If you’re looking for something more robust, check out Astrid, a free Web-based to-do manager that consistently ranks among users' favorites. The new Remind Me add-on for Google Chrome brings the Astrid service to Gmail: You can view your current tasks and, even better, click a button to turn an email message into a new task.
10. Automatically save Gmail attachments to your favorite cloud
Save your Gmail attachments to four popular cloud-storage services.
Ever wish you could save attachments directly to, say, your Dropbox account? Attachments.me is a free service that can upload Gmail attachments to Box, Dropbox, Google Drive, or SkyDrive. Just install its browser plug-in (available for Chrome and Firefox), and then link it with one or more of the aforementioned cloud services. With that done, it indexes all your attachments and then catalogs them for easy viewing and searching. With just a few clicks, you can view, download, share, or archive an attachment.
11. Give Gmail a social makeover
You know the drill: You get an email message from LinkedIn, Twitter, or the like, and then you have to click a link inside that message to view the connection, link, update, or whatever. PowerInbox embeds all that stuff within Gmail proper, allowing you to view the contents of various social-network messages right inside the messages. This Chrome add-on also lets you perform certain actions, such as commenting on Facebook updates and accepting contact requests.
12. Make your inbox “smartr”
Smartr Inbox brings a Xobni-like sidebar to Gmail.
Outlook expatriates may have fond memories of Xobni, a kind of address book on steroids. Smartr Inbox for Gmail brings that same goodness to your webmail, packing contact info, social-network updates, message histories, and related contacts into an attractive sidebar that you can view or hide as needed. It’s available for Chrome, Firefox, and Safari, and it’s one of those tools you’ll quickly find you can’t live without.
13. Keep branded messages out of your inbox
Keep nonessential email out of your inbox with PhilterIt.
Admit it: Half the clutter in your inbox comes from stores, social networks, and other "branded" sources. PhilterIt for Chrome "philters" all that stuff out of your inbox, relegating it to an icon-laden Gmail sidebar where you can review it later, at your convenience. It’s a quick and easy way to excise inbox clutter, while still keeping the stuff you might want to see.
14. Add attachments from services other than Google Drive
If you’re a Gmail user, you know how easy it is to attach files from your Google Drive. But what if you want to attach something from Box, Dropbox, Evernote, Facebook, or Flickr?Cloudy for Chrome lets you attach files from those services and other cloud hangouts. Just click the Attach button while composing a new message, and then choose a cloud service or social network. You can even attach multiple items from multiple services.

It came from the lab

15. Reply to mail faster with canned responses
Canned responses let you quickly insert boilerplate text into email.
Do you routinely find yourself typing out the same replies over and over? Labs feature Canned Responses can save you time, as long as you keep the messages short. After enabling it, just compose or reply to a message, click the More Options arrow, mouse overCanned responses, and choose the one you want. You can also create new ones as needed. It’s not the most elegant addition to Gmail, but it’s definitely a handy one.
16. View messages without clicking through
Ever wish Gmail had a preview pane? You can give it one.
Gmail annoyingly lacks a preview-pane option, which means you have to click any email you want to read and then go back to the inbox and click another—a slow, time-wasting process. Thankfully, Labs feature Message Sneak Peek simplifies things a bit: Just right-click any message to immediately see its contents in a preview window. Even better, enable Preview Pane, which gives you a bona fide preview window alongside your inbox.
17. Mark messages as read with one fewer click
Sometimes the best timesavers are the simplest. If you’ve used, say, Message Sneak Peek to look at an email message and now want to mark it as read without clicking into theMore menu, enable Labs feature Mark as Read Button. After selecting one or more messages, you’ll see that button on your toolbar. One click, and presto.

Gmail from the outside in

18. Set up smart triggers
Bend Gmail to your will with help from IFTTT.com.
Wouldn’t it be cool if Gmail could notify you via smartphone whenever an email marked "urgent" comes in? Or if it could automatically save starred messages to your Evernote account? Those are just some of the "recipes" available on If This Then That’s Gmail Channel, which also lets you create your own triggers to make Gmail do all kinds of cool things.
19. Add specific Gmail bookmarks to your browser
Add a Compose shortcut to your browser.
When you want to compose a new email message, you know the drill: Open Gmail and then click the Compose button. But you can save a step by adding a bookmark to your browser’s Favorites bar—and not just for Compose, but also for things like Starred, Sent Mail, and even specific labels. Simply click the desired option in your browser, and then create a new bookmark for it by dragging the URL in the browser's address bar over to the browser's Favorites bar. Now you have one-click access to your favorite Gmail functions.
20. Switch to Mailbox for iOS


Want to use the new Mailbox app? Patience.
Though still in beta, Mailbox for iOS is rapidly emerging as the preferred app for using Gmail on your iPhone. Among other features, it lets you "snooze" messages for later (much like tip #8, above). And it definitely promotes the "inbox zero" philosophy of simplifying your email. Best of all, it’s free—though you'll probably have to wait in line to get it.
21. Add PGP encryption to your Gmail email
Concerned about email security? You should be: Webmail in particular tends to be fairly insecure, as evidenced by any number of recent high-profile hacks.Mailvelope (in beta for Chrome and Firefox) lets you exchange encrypted email by way of OpenPGP encryption. You can generate your own public and private keys, and then just click a little lock icon to make sure your mail goes through with heavy-duty protection.
Read More
Posted in | No comments

Tuesday, February 19, 2013

How to banish Metro from your Windows 8 PC forever

Posted on 4:33 AM by Unknown

In a world exploding with tablets and touchscreens, Microsoft's decision to saddle Windows 8 with the finger-friendly Modern interface formerly known as Metro makes a lot of sense—for Microsoft. But if you're among the majority of Windows users who aren't using a tablet or a touchscreen, the focus on Live Tiles and mobile-centric apps is more of a frustration than a feature. Vexingly, Windows 8 is riddled with sneaky ways to drag you out of the desktop and dump you on that shifting, shiny Start screen.
Windows 8 and its controversial interface will come preinstalled on practically every computer sold over the next few years, but fear not! Die-hard desktop jockeys don't have to learn to stop worrying and love the Live Tiles.
Here's a step-by-step guide to banishing the Modern interface from your Windows 8 life. Once it's gone, you might just come to appreciate Windows 8 even more than you do Windows 7. I have.

Set the stage

chrome
The Google Chrome icon.
Given the Modern interface's deep hooks in Windows 8, it's hardly surprising that cutting the cord isn't an instantaneous one-snip process. Every major program you might need for everyday use—from Mail to Messaging to Video—shows up in Modern app form, rather than as a proper piece of desktop software. So before you can excise Modern, you have to find some desktop alternatives for the default apps.
Your critical mix will undoubtedly differ, but I found that I could satisfy my basic needs with Thunderbird, a free email client that blows the pants off the Windows 8 Mail app; Digsby, a versatile IM client that works with a cornucopia of chatting services (unlike the Windows 8 Messaging app); the Spotify desktop app, toreplace the sultry streaming tunes of the Windows 8 Music app; the SkyDrive desktop app, which is far more flexible than its Modern app counterpart; and Google Chrome. (Sure, Windows 8 includes a desktop version of Internet Explorer, but I prefer Google's browser.) If you want to be able to play DVDs on your Windows 8 machine—something that Windows Media Player doesn't do by default—I recommend picking up VLC along with the other things you're busily downloading.
Once you've compiled a hefty stash of desktop programs, you'll want to make the most-used ones readily accessible, since Windows 8 lacks a Start button. Cluttering up your desktop with shortcuts is one approach, but I prefer to pin icons for my most-used programs to the taskbar. Right-click a program and select Pin to Taskbar to do just that. I use the same trick to pin a Control Panel icon to the taskbar.

Diddling with defaults

Changing your default programs is an important step in exorcising the Metro interface.
Next, you'll want to make those programs the defaults for opening their associated file types—to prevent Windows 8 from opening files with the Modern apps that ship with the system. When you launch them for the first time, many programs will ask whether you'd like to make them the default; just say yes!
Now either search for 'Default programs' on the Modern Start screen (we haven't banished it yet!) or select to Control Panel > Programs > Default Programs > Set your default programs. (That's why I like to have access to Control Panel from the taskbar.) You'll see a list of all of your PC's programs. Click each of your new desktop programs in turn, enabling it as the default option for its associated file types. If you didn't download VLC, be sure to enable Windows Media Player as the default for video and audio files, or you'll be dumped into one or the other of the Modern interface's slick, vapid Video and Music apps, whenever you open a media file.

Searches and Start button replacements

Here's where things get interesting. Just how much do you hate the Modern Windows 8 interface? The answer makes a crucial difference in how you should arrange to sift through your apps and search your system.
If you absolutely, positively, soul-searingly loathe the new look of Microsoft's operating system, you'll want to download a program that restores the traditional Start button to the Windows 8 desktop. That way, you'll never have to return to the Windows 8 Start screen to search for specific software or files that aren't already pinned to your Taskbar or otherwise present on your desktop. Start8 and Classic Shell are excellent options for doing just that—and they give you the option of booting directly to the desktop. Win-win!
After months of using Windows 8, day-in and day-out—both with and without Start button Band-Aids—I recommend that you swallow your Modern misgivings in this solitary circumstance. Windows 8 has powerful search capabilities that rock, and I've come to appreciate them much more than the staid ol' Start button.
Unlike the rest of the Metro interface, the All Apps screen is surprisingly handy even on a PC.
Biting this bitter bullet doesn't mean swimming in Live Tiles, though. Instead, you can create a desktop shortcut that rockets you straight to the Modern All Apps screen (or as I call it, my new and more efficient Start menu).
To do so, right-click on your desktop and select New > Shortcut. Copy and paste the following text into the Location box, and then click Next:
%windir%\explorer.exe shell:::{2559a1f8-21d7-11d4-bdaf-00c04f60b9f0}
Give the shortcut a name—I went with the straightforward "All Apps"—and then click Finish. At once, a shortcut to the All Apps screen appears on your desktop, which you can pin to your taskbar if you so desire. The All Apps screen includes a full-screen list of all the programs on your computer, or you can start typing the name of a file to initiate a search.

Boot straight to the desktop

After you've set up your desktop programs as defaults and sorted out your Start button dilemma, you need to configure your PC to boot straight to the desktop, bypassing the Windows 8 Start screen.
Using Windows 8's own built-in Task Scheduler to bypass the Metro Start screen is a delicious irony.
First, open the Task Scheduler by typingSchedule task in the Settings search on the All Apps screen, or by deep-diving toControl Panel > System and Security >Administrative Tools > Schedule Tasks.
Once the Task Scheduler is open, clickCreate Task under Task Scheduler Library in the Actions pane. Name your task "Boot to desktop" or something similar. Open theTriggers tab, select New, and choose At log on in the 'Begin the task' drop-down menu at top. Click OK, and then open the Actions tab, select New once again, and enter explorer in the Program/script field.
Save the action and the task, and you're done! From now on, every time you log in to Windows, you'll automatically jump to the desktop, where an open Libraries folder will greet you.

Setting up to shut down

Can you taste your future Metro-free life? We're almost there. The final step involves creating a custom Shutdown button for your desktop, so that you won't have to "Swipe the charm bar"—the teenager in me just giggled—ever again.
Right-click any empty space on your desktop, and choose New > Shortcut. Copy and paste the following text into the Location field, and then press Next:
shutdown /s /t 0
On the next screen, name the shortcut "Shutdown" and click Finish. The shortcut will appear on your desktop, sporting a generic icon. Swap the icon out by right-clicking the shortcut and choosing Properties. Open the Shortcut tab and click the Change icon button at the bottom. A big list of available icons will appear—I recommend using the Power button icon.
I also recommend placing the Shutdown shortcut far away from any other files on your desktop. The shortcut shuts your computer down immediately, without any warning or additional prompts, and it's a major pain if you click it by accident.
Behold the desktop of a Windows 8 PC well fortified to withstand Metro.
That's it: You've banished the Modern interface from your Windows 8 life! If you've followed all of the instructions above—and opted to go the All Apps route rather than installing third-party Start button software—your desktop should look something like the one showwn in the screenshot. (The folder with the green arrow in the taskbar is the All Apps shortcut.) Enjoy Windows 8's lightning-fast boot times and extensive improvements under the hood, without the annoying new interface.

Extra credit: Buh-bye, lock screen

Still feeling frisky? Technically, the Windows 8 lock screen doesn't have anything to do with the Modern interface; but it's superfluous on a nontouchscreen computer, and frankly its default inclusion simply serves as a reminder of Windows 8's tablet-first design. Terminate it with extreme prejudice (or at least with some quick configuration tinkering).
Search for "Run" or press Windows + R on your keyboard to open the Run command. Typegpedit.msc and press Enter. Navigate to Computer Configuration > Administrative Templates > Control Panel > Personalization in the Local Group Policy Editor's left-hand menu pane. Click the Do Not Display the Lock Screen option that appears in the main pane, select the Enabled option in the new window, and click OK to save your changes and never see the silly lock screen again.
Source
Read More
Posted in how to, windows 8 | No comments
Newer Posts Older Posts Home
Subscribe to: Posts (Atom)

Popular Posts

  • Will New Internet Domain Names Change the Web?
    Finally, the World Wide Web will live up to its name. The decision by the Internet Corporation for Assigned Names and Numbers (ICANN) that W...
  • How to sync files and folders across two PCs
    Here are four ways to do this, although--technically speaking--only two of them actually keep the files on both PCs. The others merely make ...
  • Rugged laptop guide
    Our rugged laptop guide will give you more information on rugged laptops and rugged notebooks than, let’s say, 95% of regular rugged laptop ...
  • LinkedIn shuts down would-be hook-up service
    LinkedIn has shut off its API access to “Bang With Professionals,” a Web service that was intended to facilitate more, say, intimate connect...
  • Yahoo Reject Microsoft ! Glance At New Corp.
    As we know, Microsoft is aggressively try to overtaking Yahoo. They launch 44,6 billion dollar AS bid ! This is the biggest offer that ever ...
  • Rumored Sony PS4 controller shows new thumbsticks
    As the speculation on Sony's next game console is ramps up ahead of  next week's press event , a pair of images have surfaced, purpo...
  • Twitter: Hacking attacks may have accessed data of 250K users
    Twitter said today that it recently detected a series of attempts to hack into user data, and that the attackers may have successfully absco...
  • Why Microsoft redesigned Windows
    Windows 8 has its fans and foes, but Microsoft felt the time was ripe for a new look and feel for a product used by more than 1.2 billion pe...
  • How Access Registry Using Command Prompt
    Firstly, you need to know that regedit.exe is a tool that created to access registry based on windows. And reg.exe is a tool that created ...
  • Pirate Bay to sue antipiracy site for pirating its design
    An antipiracy group may find itself in legal trouble after borrowing the look of the Pirate Bay Web site for a new campaign. The Pirate Bay...

Categories

  • apple
  • browser
  • buy
  • christmas
  • computer information
  • crack
  • cyber monday
  • download
  • files
  • firewall
  • flash disk
  • font
  • graphene
  • hard disk
  • hidden
  • Hot News
  • how to
  • intel
  • Internet
  • Internet Explorer
  • iOS
  • iPad
  • Mac
  • Malware
  • nokia
  • notebook
  • play station 4
  • processor
  • removal
  • safe
  • samsung
  • samsung. microsoft
  • security
  • sony
  • ssd
  • The Meaning Is
  • tips
  • twitter
  • ubuntu
  • video card
  • virus
  • vulnerability
  • What to do
  • windows 8
  • windows7

Blog Archive

  • ▼  2013 (90)
    • ►  October (2)
    • ►  September (6)
    • ►  August (3)
    • ►  July (4)
    • ►  June (5)
    • ►  May (9)
    • ►  April (14)
    • ►  March (11)
    • ▼  February (17)
      • PlayStation 4 vs. PC graphics: Can Sony even compete?
      • How to make Ubuntu Linux look like Windows 7
      • Power through Gmail with 21 time-saving tricks
      • How to banish Metro from your Windows 8 PC forever
      • Rumored Sony PS4 controller shows new thumbsticks
      • Pirate Bay to sue antipiracy site for pirating its...
      • Secure boot loader now available to allow Linux to...
      • LinkedIn shuts down would-be hook-up service
      • How to optimize Windows 8 on old hardware (2)
      • How to optimize Windows 8 on old hardware (1)
      • Facebook Connect issue wreaks havoc on the Web
      • Ubuntu OS smartphones to hit stores in October
      • Apple wins design patents for slide-to-unlock, ori...
      • Latest jailbreak for iOS arrives, works with iPhone 5
      • Samsung Galaxy S4 a no-show at Mobile World Congress
      • What it really takes to make a flexible phone (Sma...
      • Twitter: Hacking attacks may have accessed data of...
    • ►  January (19)
  • ►  2012 (27)
    • ►  December (22)
    • ►  November (5)
  • ►  2010 (4)
    • ►  June (1)
    • ►  January (3)
  • ►  2009 (32)
    • ►  December (2)
    • ►  November (11)
    • ►  October (11)
    • ►  September (2)
    • ►  March (2)
    • ►  February (4)
  • ►  2008 (39)
    • ►  October (2)
    • ►  September (2)
    • ►  August (1)
    • ►  June (1)
    • ►  May (3)
    • ►  March (1)
    • ►  February (7)
    • ►  January (22)
  • ►  2007 (46)
    • ►  December (8)
    • ►  November (9)
    • ►  September (4)
    • ►  August (2)
    • ►  July (9)
    • ►  June (14)
Powered by Blogger.

About Me

Unknown
View my complete profile